
Introduction
This guide documents a complete 4.0L OHV engine swap using a 1994 Ford Explorer donor into a 1989 Ford Bronco II originally equipped with the 2.9L V6. It covers donor selection, engine removal, fuel system modifications, wiring harness integration, power distribution box wiring, transmission compatibility, and final installation details.
This swap retains the original FM-146 manual transmission while upgrading to the Ford 4.0L V6 for improved reliability, power, and parts availability.
Detailed photos, wiring diagrams, and real-world troubleshooting tips are included to help Bronco II owners complete this conversion successfully.
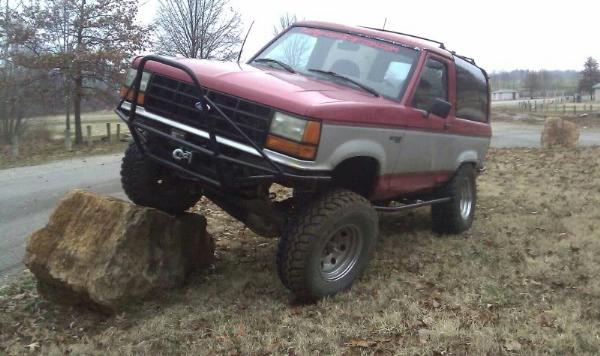
Vehicle Coverage: 1989 Ford Bronco II
Donor Engine: 1994 Ford Explorer 4.0L OHV V6
Skill Level: Advanced (wiring and fabrication required)
Disclaimer
The BroncoiiCorral.com, the Bronco Corral Staff, nor the original poster is responsible for you doing this modification to your vehicle. By doing this modification and following this how-to you, the installer, take full responsibility if anything is damaged or messed up. If you have questions, feel free to PM the original poster or ask in the appropriate section of the BroncoiiCorral.com forums.
I advise you to do a thorough tune up to your new motor. Clutch (if applicable), plugs, wires, PCV, air filter, oil, oil filter, antifreeze, power steering fluid, fuel filter, serpentine belt, water pump, valve cover gaskets (please go with Permadry, don’t use cork), oil pan gasket. If you have the money to go ahead and replace the oil pump. I didn’t have the money to throw at one before my swap.
Since my donor had an auto in it, I kept my original FM-146 transmission. I ordered a new 4.0 flywheel, 4.0 slave, and 4.0 clutch kit to make it work with the new motor (I found out after that the 93-94 slave cylinders have a different fitting than the earlier years so instead of buying a another slave and dropping the tranny, I chose to buy a 94 master cylinder and clutch line for a little over twice the price of a slave, but I didn’t have to drop the tranny again so it was worth it to me.)
The Donor

The Recipient
First thing if you are pulling from a running vehicle. Remove fuel pump fuse, or hit the fuel cut off switch. Start it and let it run lines dry.
Disconnect and remove the battery.
Drain radiator, oil, and power steering fluid.
Remove radiator, starter, a/c lines, power steering lines, cruise and throttle cables, fuel lines, vacuum lines.
Return bolts to original hole after removing any brackets or whatever so you know where they go and don’t end up with a pile of unknown bolts at the end of your swap.

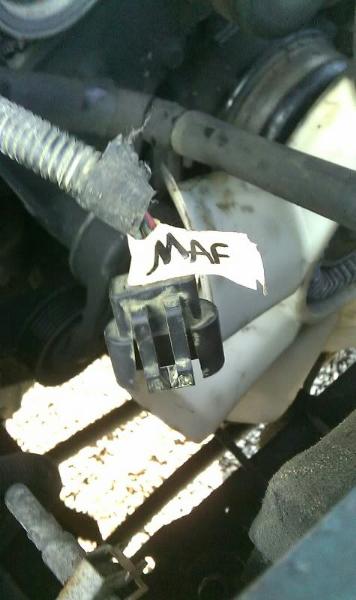
Remove and mark all plugs that are before the main harness plug, i.e.: MAF, alt, headlight plug.
Disconnect two big plugs next to the alternator. This will let you keep the harness on the motor, on there.
Disconnect headlight harness on driver’s side.
I am not going into any details about pulling and installing the motors. That is pretty straight forward.
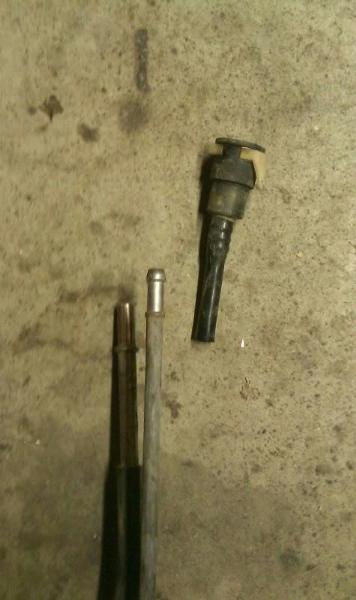
Before dropping the motor in, swap the fuel lines from fuel filter to disconnects with your donor (I did this after the motor was in. It would just be easier to get to.) The disconnects at the motor are not the same between the 2.9 and 4.0.
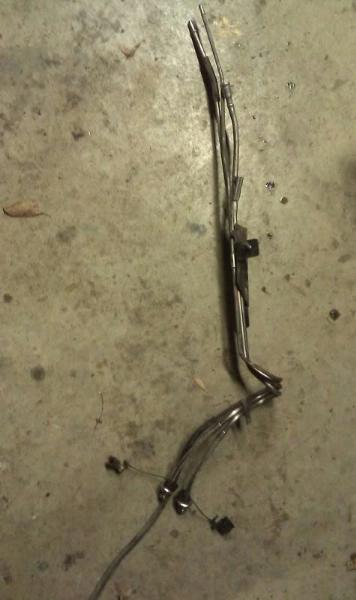
Now on the filter end, the return line on the 2.9 is female, but the 4.0 is a male.

There are several ways to go about this. Here is what I did. I cut off the female end and slid it on the 4.0 lines and added a hose clamp for security. If you do this, heat up the metal line and slide the plastic over it. If you heat the plastic, you could deform it and may not seal. If you go this route, use a 4.0 fuel filter. The lines will connect to the older one, but the nipple on the filter is not as long and you won’t be able to get the removal tool behind it to remove later.
Also keep your existing line from fuel tank the charcoal canister unless you swap that out also. You’ll have to extend the line from the TB to the canister if you don’t swap them.

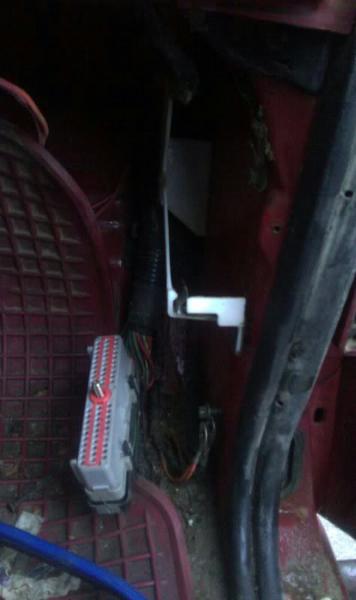
Pull the 4.0 engine harness. Everything should unplug until you get to where the distribution box meets the headlights next to the battery. Cut here keeping the alt, starter and solenoid harness. Others have used the 2.9 starter harness. I found that it didn’t reach the 4.0 starter, so I swapped it out. I also used the 4.0 alt harness. I had to cut one wire that went into the headlight harness, but I just spliced it to the same wire coming from the 2.9 HH. They were both a GREEN/RED wire. Pull the 2.9 harness the same way but don’t cut the wiring yet. With both distribution boxes next to each other, cut the wires off the 2.9 box one at a time and wire them to the 4.0 box accordingly. I wired together the power doors, headlights, and interior fuse box. The EEC on the 4.0 harness (GREEN/RED wire) needs to be wired to the ignition switch. I used one of the spare fused links in the distribution box temporarily to get it running. I could not get the fuel pump to kick on when wiring it to the 4.0 harness. Not sure where it ends up coming out at, but I ran a wire from plug on the driver fender (PINK/BLACK wire) to the GREEN/YELLOW wire on the fuel pump relay. You will end up with a bunch of spare wires that you can use to fuse extra lights, winch, or whatever. I made a sheet with the wire color code and fuse location so I could identify them later. These must all be taped off since the box uses a common power, they could ground out. There is a 2-wire plug coming out of the harness near the battery also. One wire is black, the other is BLACK/WHITE. These must be grounded.


As far as the driver fender wiring, use The Bronco II’s diagram here:

(Click To Enlarge)
He swapped from and unknown year Explorer to an 89 Bronco II so the wiring on the truck side was the same. The Explorer side was also for the most part. One or two that were different, but easy to figure out. Also, one of my plugs were brown and his description says gray.
I cut the connectors off both ends of the unused harness and did most of the splicing there so if I needed to remove it later it would be easy.

On the Explorer auto harness, I spliced together the RED/LIGHT BLUE and PINK wires in the cannon plug to bypass the neutral switch. I have yet to wire in my reverse lights. I’ll update with colors once I do.
Make sure to solder your spliced wires. You don’t want a short down the road that you have to track down.
Plug everything back in, hook up vacuum lines, install the 4.0 throttle cable, air filter, exhaust, fill it with fluids and fire her up. If you have cruise and want to swap that, just remove the cable from the 4.0 servo and put it on your 2.9 servo. Its (2) 10mm bolts.
Helpful Links
The Bronc’s 4.0 | The Ranger Station
1988 Ranger 2.9 to 1992 Explorer 4.0 SWAP Write-up | The Ranger Station
A4LD to F146 (Mitsubishi) 5-Speed Swap – The Ranger Station
FM146 to M5OD and Complete Clutch Upgrade – The Ranger Station
91-94 X Schematics / Diagrams | Ford Explorer Forums
Wiring Diagrams
Click to enlarge


 I am also attaching a couple Explorer diagrams to the thread.
Vacuum Diagram

I should also note that I am still waiting on my clutch line, so I have not driven it yet, but the motor starts and runs well. It took me a week to prep the 4.0 for install and 4 days from pulling the 2.9 to having the 4.0 running.
Contributor
This information was contributed by forum member: Dustin Ewers (disciplerocks)
About The Author
Jim Oaks is a longtime Ford truck and SUV enthusiast and the founder of The Ranger Station and Bronco II Corral. With decades of hands-on experience, he writes both technical and non-technical articles covering the Ford Bronco II, including mechanical systems, factory engineering, common upgrades, and detailed feature vehicle write-ups.
In addition to technical content, Jim documents Bronco II history, rare factory and aftermarket models, production details, and original Ford marketing materials. His work is based on firsthand experience, original documentation, and long-term involvement in the Ford enthusiast community.
Through his sites, Jim has built comprehensive reference libraries that serve owners, builders, restorers, collectors, and historians, helping preserve the Bronco II’s technical knowledge and historical significance.