
Specifications, Removal & Installation
This page covers the Ford Bronco II fuel tank, including factory fuel tank capacity, step-by-step fuel tank removal and installation procedures, and important year-to-year differences that affect replacement and compatibility.
The procedures below apply to 1984–1990 Ford Bronco II models and include instructions for safely draining the fuel tank, disconnecting fuel lines and vent hoses, removing the skid plate and mounting straps, and reinstalling the tank while checking for leaks.
Special attention is given to the 1984 Bronco II fuel tank, which uses a smaller fuel gauge sending unit opening than the 1985–1990 fuel tanks. This difference is critical when replacing a fuel tank or swapping sending units.
Capacity = 23 Gallons
Removal
NOTE: Read the entire service procedure and refer to the illustrations before starting repair–modify the service steps as necessary. Always replace all gas line hoses and retaining clamps if necessary.
- Insert a siphon through the filler neck and drain the fuel into a suitable container. Drain the fuel tank by removing drain plug if so equipped.
- Raise the rear of the vehicle and safely support. Remove the skid plate, if so equipped.
- To avoid any chance of sparking at or near the tank, disconnect the ground cable from the vehicle battery. Disconnect the fuel gauge sending unit wire at the fuel tank.
- Loosen the clamp on the fuel filler pipe hose at the filler pipe and disconnect the hose from the pipe.
- Loosen the hose clamps, slide the clamps forward and disconnect the fuel line at the fuel gauge sending unit.
- Support the fuel tank assembly. Remove the strap attaching nut at each tank mounting strap.
- Swing the strap down and lower the tank enough to gain access to the tank vent hose.
- Disconnect the fuel tank vent hose at the top of the tank. Disconnect the fuel tank-to-separator tank lines at the fuel tank.
- Lower the fuel tank and remove it from under the vehicle
To install
- Position the forward edge of the tank to the frame crossmember and connect the vent hose to the top of the tank. Connect the fuel tank-to-separator tank lines at the fuel tank.
- Position the tank and mounting straps and install the attaching nuts and flat washers. Tighten mounting strap retaining nuts evenly.
- Connect the fuel line at the fuel gauge sending unit and tighten the hose clamps securely. Install the drain plug, if so equipped.
- Connect the fuel gauge sending unit wire to the sending unit.
- Install the skid plate and tighten the mounting nuts, if so equipped.
- Connect the filler pipe-to-tank hose at the filler pipe and install the hose clamp.
- Connect the vehicle battery ground cable.
- Fill the tank and check all connections for leaks.
- Lower the vehicle.

Important Note
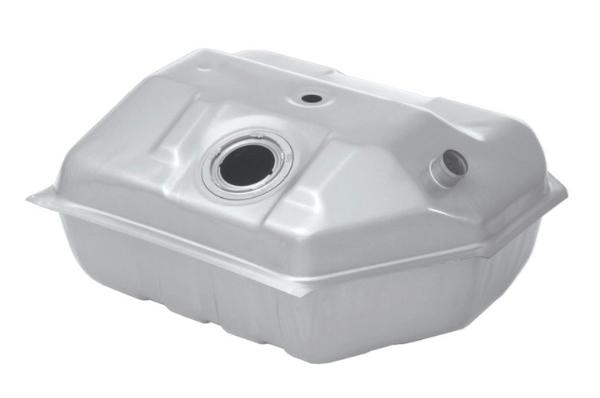
The 1984 Ford Bronco II fuel tank has a smaller opening for the fuel gauge sending unit / pickup is smaller on the 1984 fuel tank, than the 1985-1990 fuel tanks. If you’re replacing your fuel tank, make sure you have the right tank with the right size opening.
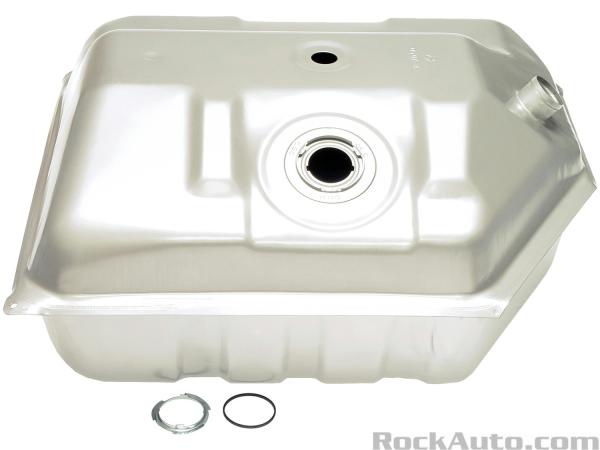
1984 Ford Bronco II Fuel Tank (above)
1985-1990 Ford Bronco II Fuel Tank (below)
Last Updated:
About The Author
Jim Oaks is a longtime Ford truck and SUV enthusiast and the founder of The Ranger Station and Bronco II Corral. With decades of hands-on experience, he writes both technical and non-technical articles covering the Ford Bronco II, including mechanical systems, factory engineering, common upgrades, and detailed feature vehicle write-ups.
In addition to technical content, Jim documents Bronco II history, rare factory and aftermarket models, production details, and original Ford marketing materials. His work is based on firsthand experience, original documentation, and long-term involvement in the Ford enthusiast community.
Through his sites, Jim has built comprehensive reference libraries that serve owners, builders, restorers, collectors, and historians, helping preserve the Bronco II’s technical knowledge and historical significance.